|
For some reason, people always come to us with what at first seems to be an impossible task.
Richard "Roo" Terry, Sales Bod from Sony U.K. was no exception. He had a very clear understanding of what he wanted, but wouldn`t go with our initial recommendation of getting a bigger car!
The criteria was simple, this was to be built as a Demo Car for Sony U.K. to show the capabilities
of the top of the range "XES" series speakers, and they were to be run on the "XM" series of Amplifiers. One Amp for the Tweeters, One for the Midrange, One for the Midbass, and two Amps for the Subwoofer. Oh, and not forgetting the incredible Laptop programmable Equalisation unit that Sony also produce.
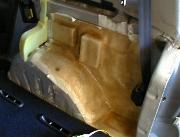
The chosen vehicle was a Renault Espace, but as ever, there was a slight catch, due to all seven seats being required, along with the floor / loading area, major builds were out of the question. This meant that anything fitted had to be within the "original lines" of the car. When quizzed as to exactly where the five Amplifiers were to be hidden, he simply shrugged his shoulders and said, "You`re the experts!"
|
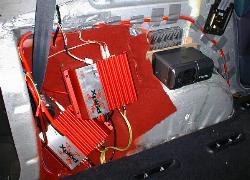
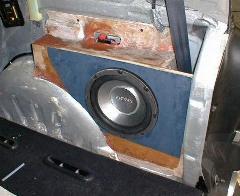
Sub Amplifier(s)
We started at the back of the car, where we knew we had some spare space. The rear quarter panel was stripped out and a base was fabricated to sit the two Amps on. As the Subwoofer has a Dual Voice Coil, one amplifier will be used to drive each side. The Minidisc changer can also be seen.
|
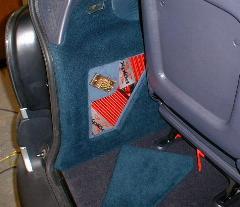
Peek A Boo
The rear quarter panels have had a viewing window cut into them by modifying the original storage cover. The panels have then been retrimmed in carpet and Alcantara, and for effect, a few strobe lights have been mounted behind the top amp. The cover for the panel can be seen on the floor, so that when fitted, the system can be hidden from view.
|
|
|
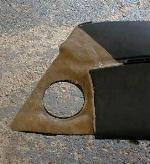
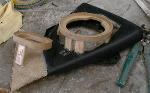
Making a Mould
First, work out the volume of your box, so you know how much area needs to be covered. Cover any obstructions (Cables / Plugs etc) with a small box made from thin card. Then cover the whole panel with 3 layers of "cheap 'n' nasty" masking tape. Ideally, the tape should be so nasty, that it has very little "stick". Then cover the whole area with 6 layers of chopped strand mat and resin. Leave this overnight to cure and then gently remove the mould and the tape.
|
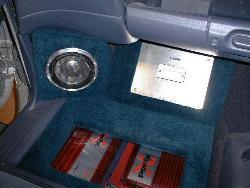
Seal the Box
The M.D.F. panels can then be attatched to the mould using fibreglass resin. Cut a hole for the subwoofer, and then make sure that all the holes and joins are completely airtight. The best way of doing this is to run the sub and listen carefully. Putting a layer of trim between the sub and the M.D.F. will also ensure that the speaker itself seals correctly.
|
|
|
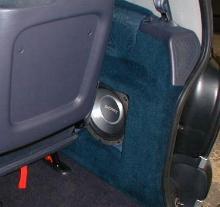
Bottom End
The rear quarter panel has also been modified to allow the sub to be seen and lots of soundproofing has also been added to ensure no vibration or rattles.
If you have got your calculations correct for the volume of the box, you should get a good tight bass, as indeed we did here.
|
Very little Space
This was hard! 3 Amps, 1 Sound Processor, and no room!
We called Richard a few names when tackling this bit. It was very diffucult to find a way of laying out the amps in such a way that they could not only all be seen, but that the cables could also be laid without interference. Access to the Processor was also required to link it to the Laptop for programming.
|

|
Hide & Seek
|
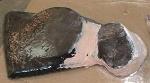
Dashboard
A similar method of Fibreglass moulding was used to construct the base of the Tweeter pods.
Cover the whole panel with 3 layers of masking tape, then cover the whole area with 6 layers of chopped strand mat and resin. Leave this overnight to cure and then gently remove the mould and trim to shape.
|
|
Taking Shape
M.D.F. speaker rings are then supported and glued in position. Hot Glue guns are excellent for this, but beware that your resin mix does not get too hot, as it can melt the glue and ruin the shape if you are not carefull.
|
|
Fill the gaps
Fabric is then stretched over the entire panel and glued around the edges. It is then covered inside and out with fibreglass and resin. Any sharp angles or imperfections are then filled with a
suitable bodyfiller.
|
|
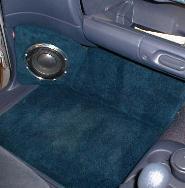
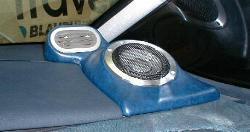
Trimmed
Once the shape has been smoothed and sanded, it can be trimmed in vinyl, and the speakers fitted.
|

|
Have a Listen
If you are fortunate enough to see the Sony Espace, ask Richard to give you a Demonstration, as the sound is out of this world!
|
We are pleased that yet another one of our Installations is to be shown off and
Demonstrated at the National Motor Show - N.E.C. Birmingham - 2000.
|