|
Just before I relocated down to the coast a few years ago, a couple of my good friends John and Matt made one of those rare Barn Finds, and managed to uncover a wreck of what was once a Beach Buggy, and as I was to be moving a mere few hundred yards from the beach, I was told over the phone that I ought to take it with me. This all sounded really good untill they showed me the pile of rust and chunks of fibreglass that had been sitting around and decaying for many, many years, and after some lengthy research towards obtaining those all important registration documents, it got me thinking: This could probably be one of the most ambitious projects that I could undertake - to build an entire car from scratch. As this was to be a pure plaything, timescale was not important, so what you see here is an ongoing project that I spend a few hours on here and there as time will allow.
Hustler GT
The Hustler GT is one of the few Beach Buggies that was produced in the UK between 1970 and 1972 by a company called Essex Proto Conversions. Only around 50 of them were ever built and there are only a handfull that have survived, making this quite a rare vehicle in the Beach Buggy world. One of its admirers was Diana, Princess of Wales, who owned a 1971 registered version.
|
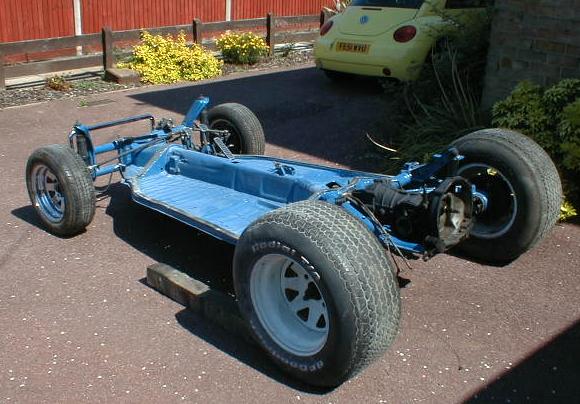
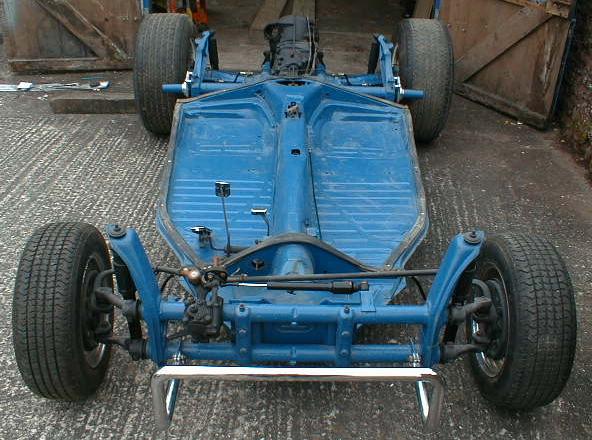
The Chassis
This car started its life as a 1966 Volkswagen Beetle, and back in the early 70`s, somebody decided to unbolt the VW bodyshell to reveal a chassis similar to this.
I say similar, because what is not so obvious is that the chassis has then been cut in half, shortened by 12 inches, and then welded back together.
|
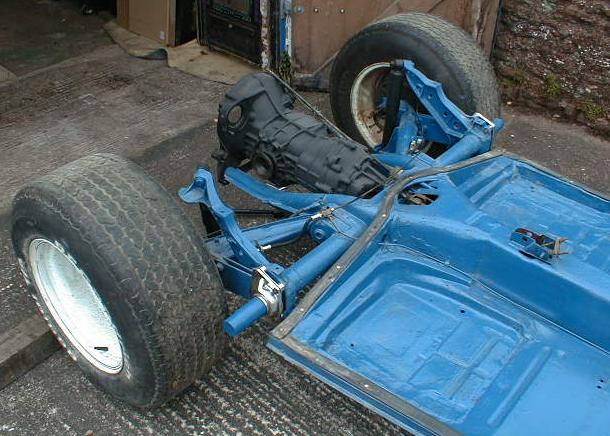
2 Cars Welded Together !
But instead of using the 1966 rear half of the chassis, it was decided to junk this and weld on the rear chassis section of a much later car instead. Unlike the earlier versions, some of the later Beetles had a preferred independant rear suspension setup that would give much better off road capability.
A true cut and shut job !!
|
|
|
Rolling Chassis
And it will not have escaped your attention, that every single nut and bolt has been removed, cleaned and restored to make this rolling chassis in a far better condition now than it ever was when it left the factory all those years ago.
Thankfully Beetle spares are still plentifull and relatively inexpensive to obtain. |
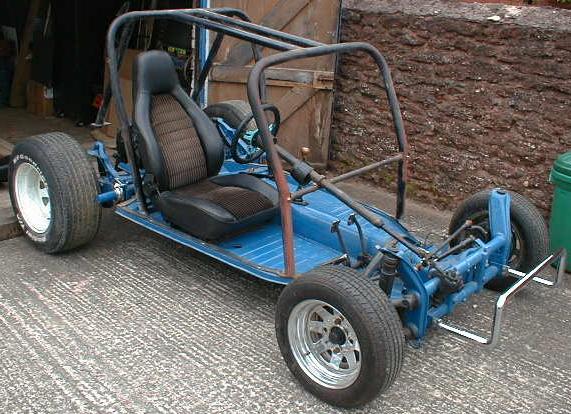
Taking Shape
Amongst the parts I had, was a very heavy (and very bent) roll cage, but I decided to initially fit it along with the steering column so that I could at least start to see where things were going to line up.
I also managed to salvage a pair of seats from a Porsche 911 that was being broken.
|
|
|
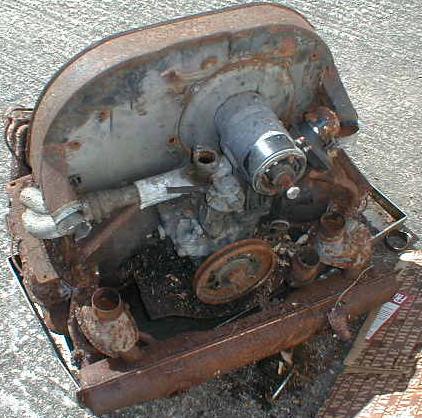
10 Years in a field !
I was told about a 1300 engine that had been sitting in a field for 10 years, and although most would have run away from something as rusty as this, what you need to bear in mind was that it was the third engine I had tried, and this initially looked in far better condition than the other two
!!
It just about turned over by hand, looked to be complete, and more importantly, it was full of oil and not orange rusty water.
|
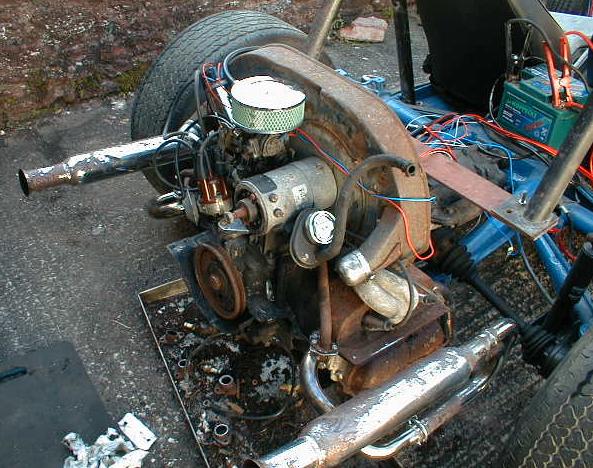
And get it going I did!
I can`t say it was the easiest engine I have ever coaxed into life, but there were enough rusty spares from the other two engines to be able to roughly cobble something together to see if it would run. But I had not envisaged just how noisy those exhausts were going to be.
With the engine in place, my tubular framed vehicle was now starting to take on a whole new look.
MAD MAX - Eat Your Heart Out !!
|
|
|
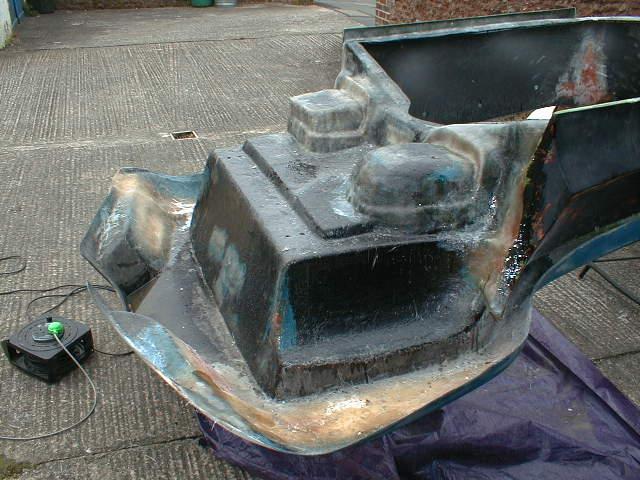
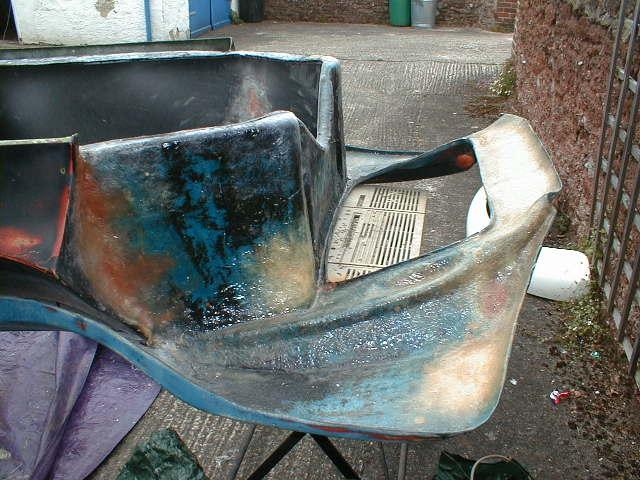
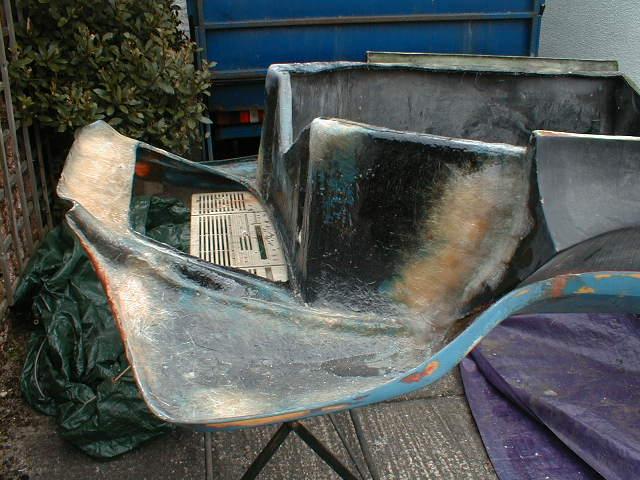
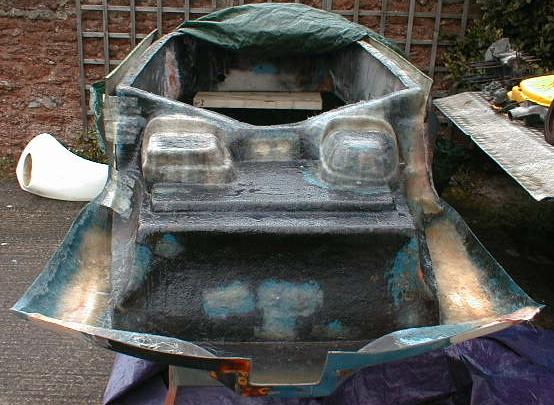
Smashed to pieces !
The bodyshell, shown here upside down, was in a terrible state, and had been broken and split in just about every direction. The shell was virtually rebuilt using many layers of fiberglass matting and lots of resin
The side pods are from a different vehicle, but I decided to attatch them to give the bodyshell back some of its missing strength down the sides.
|
|
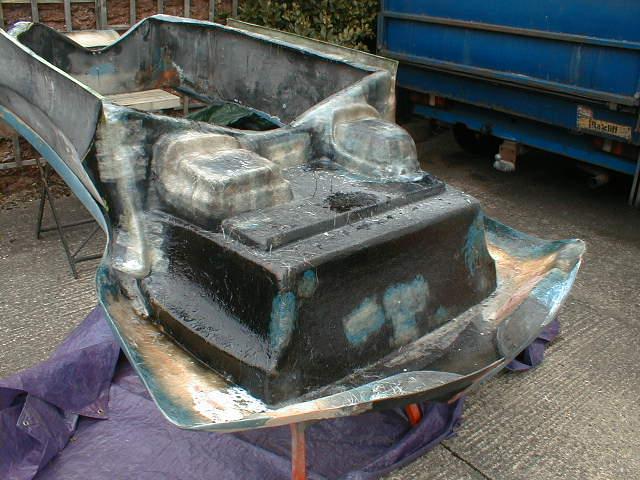
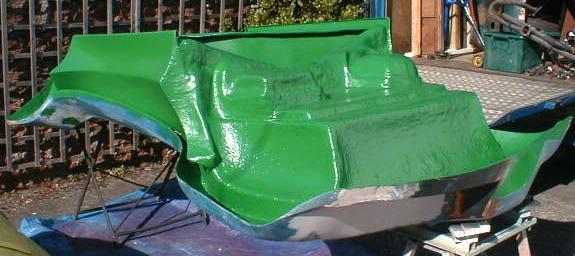
Gel Coat
Once the fibreglass had cured, a couple of layers of Gel Coat were liberally applied. This is very similar to a mixture of coloured bodyfiller and resin, and although it went on very lumpy with the brush, it can be sanded back and polished to give a very smooth and durable finish. |
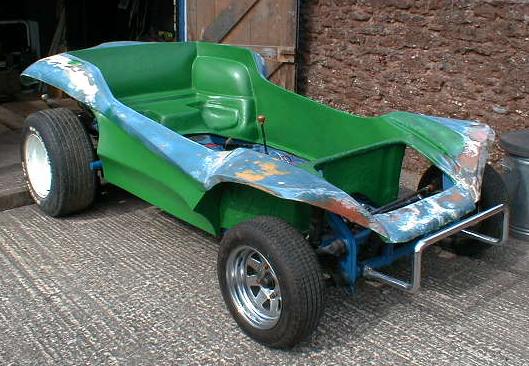
Mounting The Bodyshell
After carefully lining it up, the bodyshell was then bolted on to the chassis.
Whilst everything else is being trial fitted, much of the time will now be spent leaning on the panels, so it has been decided that the remaining Gel Coat will not be applied until I am sure that everything is in its correct place.
|
|
|
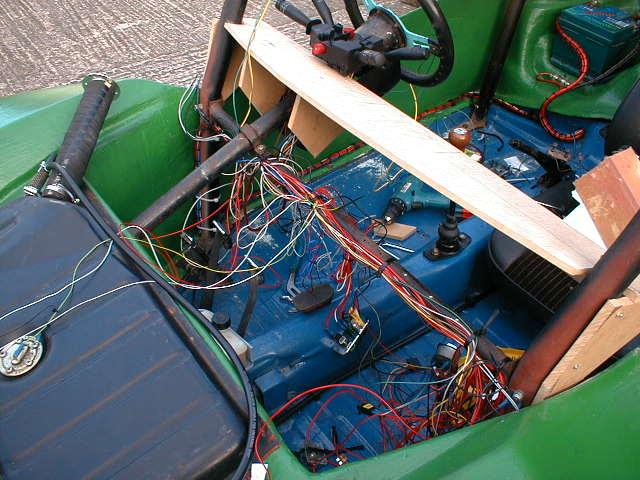
Electrickery
One thing I did not want was old fashioned 1966 electrics. I wanted a state of the art keyless ignition system, full digital dash and electrics from the 21st century.
So I simply designed and drew out an entire vehicle electrical system on a bit of paper and then built it.
The petrol pipe filler that you can see from the corner of the tank was going to prove to be a major problem later on.
|
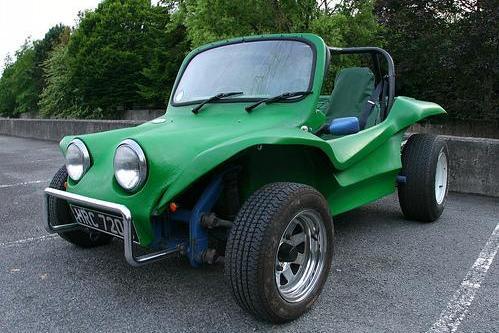
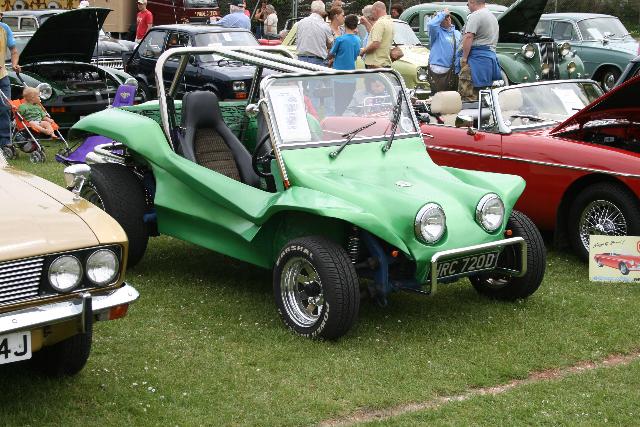
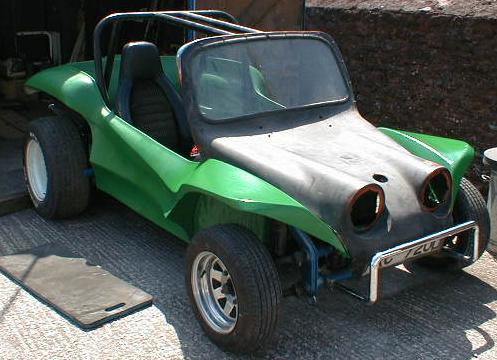
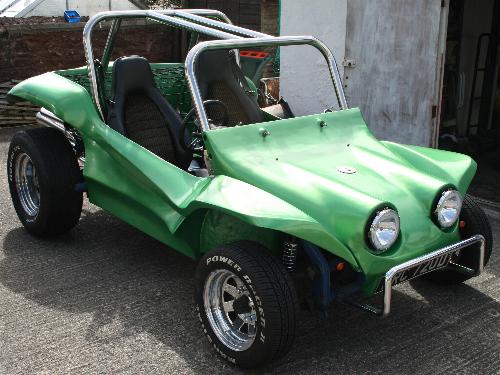
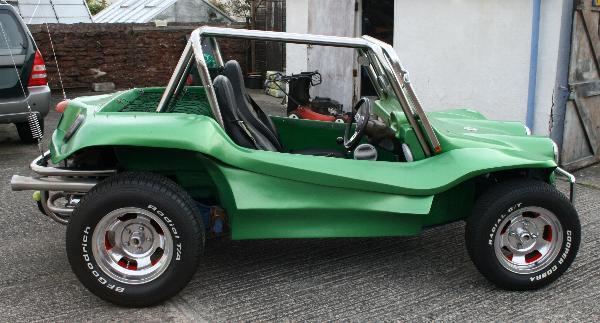
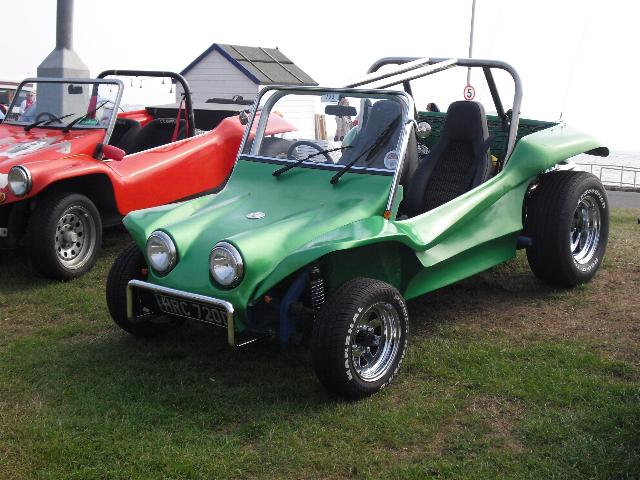
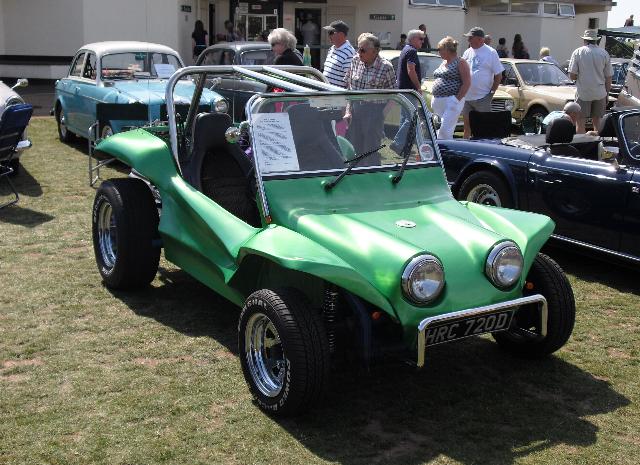
Unmistakeably a Hustler GT
The rest of the Gel Coat was applied and the front section was fitted. Some Beach Buggies are quite difficult to identify, but this one, with its trademark headlights from an old Mini is unmistakeable for anything else.
The moulded in windscreen was originally amongst the debris that I had initially purchased, and although heavily scratched and marked, had remained in one piece
And that was going to be problem No. 2
|
|
|
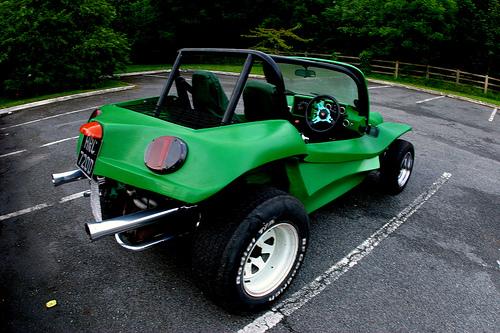
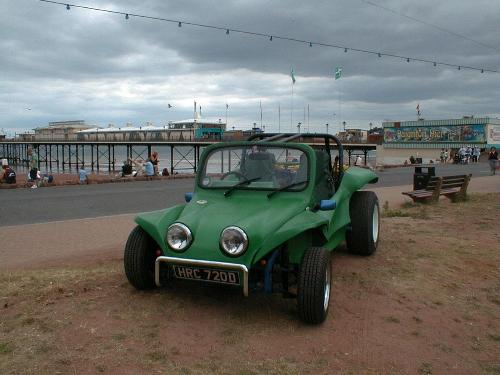
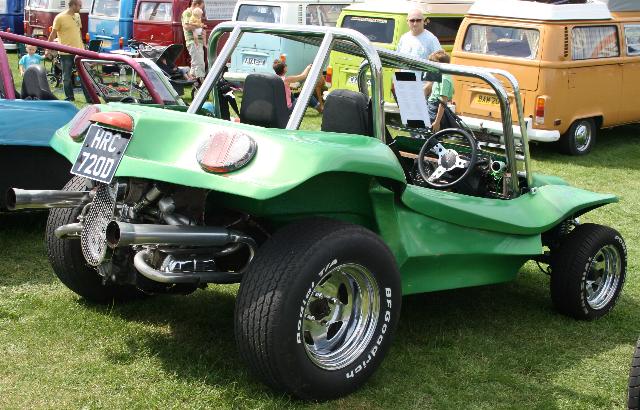
Ready for a Road Test
The Buggy was now virtually complete and ready for a road test. As I was not sure if anything was going to fall off, or problems that may arise, I decided to leave it in the rough Gel Coat finish until I was satisfied that all was Ok.
Off it went for its first MOT
And it PASSED first time !!!
|
Now that I had a valid MOT certificate, I could take full advantage of both the Historic Vehicle Tax Exemption due to its age, and the cheap classic car insurance, making it a very cheap car to use on the road. Now that I could road test it, I could make some much needed improvements and sort out some of the teething problems that were starting to arise that was inevitable with a project of this scale. But untill it has proven itself, it will remain in the Gel Coat finish, and I`m so glad that it did, because if I had finished the bodywork and painted it now, it would have been a disaster.
Don`t ask THAT question !
Generally speaking, Beach Buggy owners are amongst the friendliest and most chilled out group of people that you could ever meet, but they do get really annoyed when they are asked the same old question:
"Can you use it on the Beach?"
No, Stupid ! Its a car ! And apart from Messrs Clarkson, Hammond and May, when did you last see a car dodging the sandcastles on the Beach?
|
|
Houston . . We have a problem . . (Actually we have a few!)
One of the reasons that I put off finishing the bodywork, is that I fully understand the concept of trial and error, and no matter how well you think you have planned things and looked at them, when it comes to trying them out for real, things may not work the way you had planned them to.
Take for instance my initial trip to the MOT station - I had spent many weeks pouring petrol into the Buggy and driving it around the yard, and had not envisaged that when I pulled up at a petrol station that the pump nozzle would not fit the right angled filler neck and would take 10 minutes to fill.
Remedy: Remove the bonnet, cut and weld a new flange onto the fuel tank (yes, I did say weld a fuel tank) and relocate the fuel filler to the centre of the bonnet.
The next problem wasn`t spotted until that fatefull MOT drive either. Now, I have climbed in and out of that car more times than I care to mention, but its not until I finally settled myself down into a nice comfortable position for driving until the really obvious was spotted: The height of the roll bar at the front was so low that it obscured my forward vision, and I couldn`t actually see out of the window unless I slouched down into the seat. Not such an easy fix that one.
But the main problem I faced was that windscreen. It was very scratched and marked from day one, and although the MOT guy raised a few eyebrows, he reluctantly let it go, but it was obvious that I really should replace the glass. Problem being, that the donor windscreen is documented in a book as having come from a Fiat 500/600 from the late fifties, and they are not exactly common these days. In fact the Fiat owners club are buying them up to keep their own cars alive, and god help anybody who did what I did, and ask them to part with one for a kit car. I`m not scared of many things, but ran for my life on that occasion. But the measurements I took from a Museum car didn`t look right either, and as it was curved in two directions, having a one off made was prohibitively expensive. The only option left was to chop it all off, and use the standard Manx style windscreen as found on the modern Buggies. As I had nothing to bolt it to, I decided to go all out and have a new (taller) roll cage constructed from stainless steel and then I could bolt the screen directly to that.
|
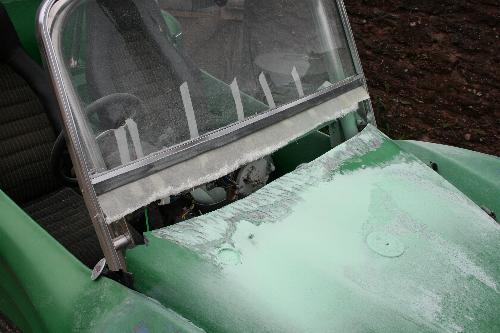
A big gap
With the roll cage expertly built and the windscreen now mounted, you can see there is a bit of a gap along the top of the bonnet and I am concerned that it may cause a bit of a draft.
You can also see where the fuel filler has been relocated as well.
Now I am really glad that I had not finished and sprayed the bodywork, as I now need to get the fibreglass out once again and make a new top edge to that bonnet. |
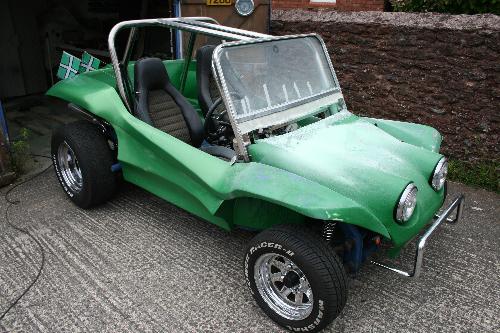
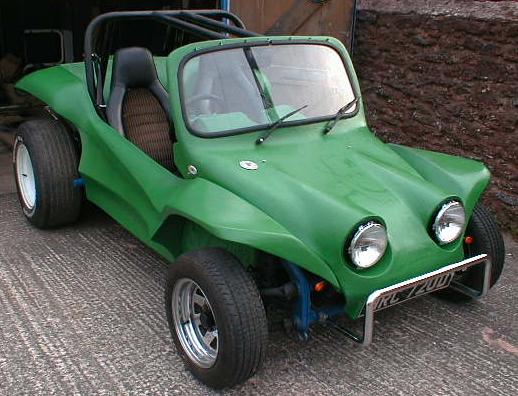
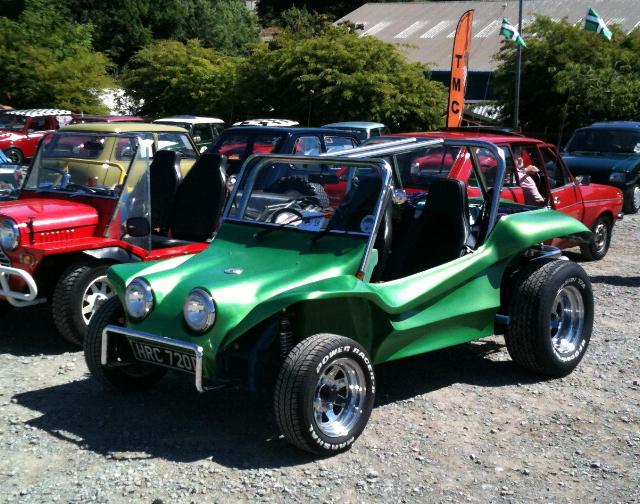
Starting to take shape
The shape did not come out too badly in the end, and although I am sad that I had to chop off a real bit of history, I am still quite pleased with the end result as it gives the car a much more modern look.
But I am still going to hold fire on too much more bodywork until I am sure that this system works.
|
|
|
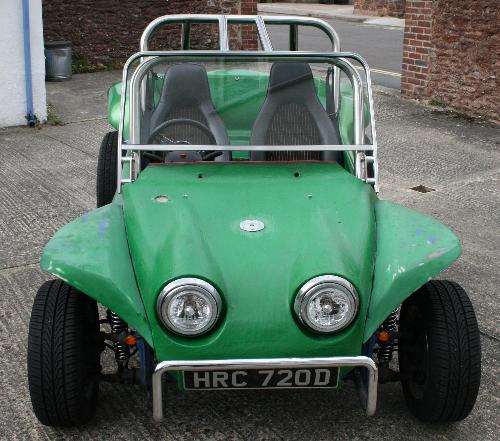
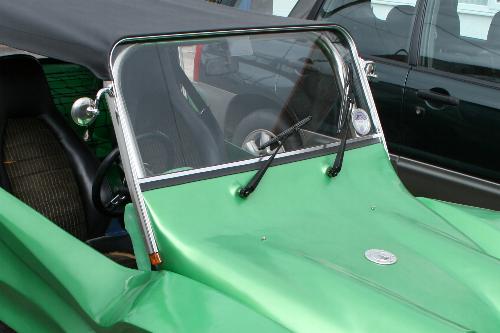
Screen Re-assembled!
And once the screen has been bolted back in place, I think you will agree that it has been completely transformed and looks all the better for it.
Side repeaters were added at the base of the screen legs and a pair of round peep mirrors have also been bolted to the frame. |
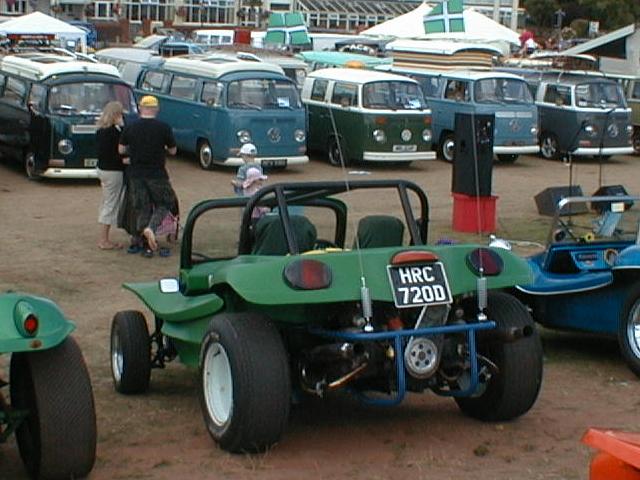
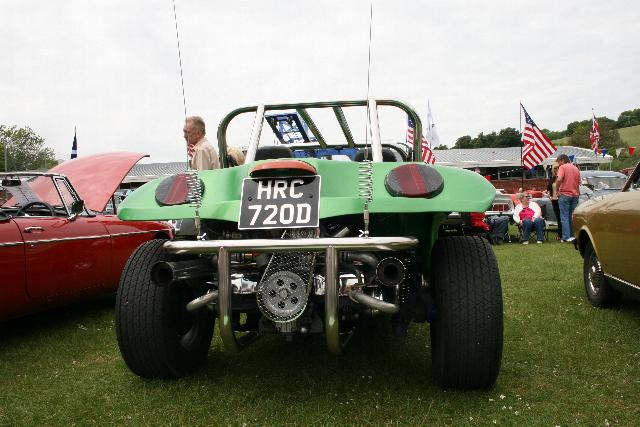
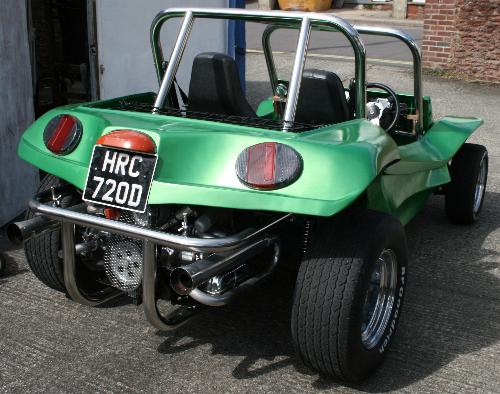
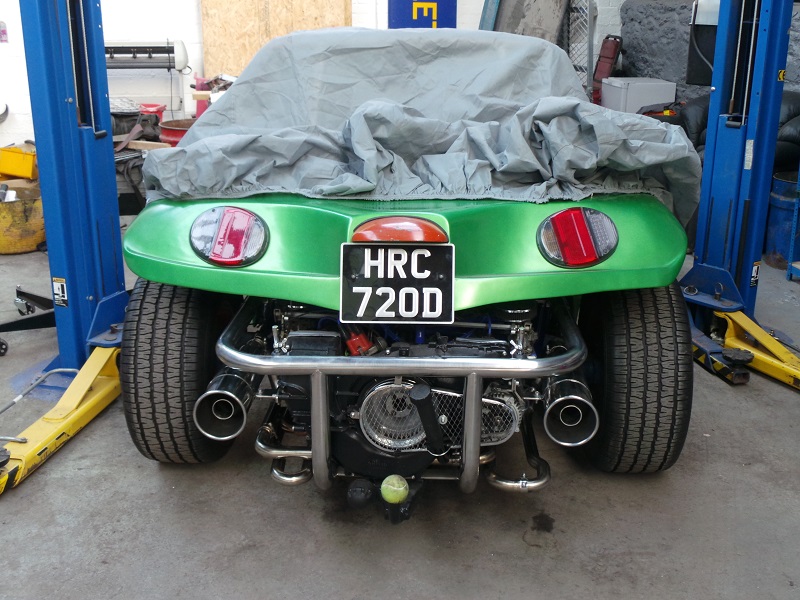
Rusty Engine - With Bling !
Yes, its still that rusty 1300 engine under all that bling, along with a few other bits and pieces. Ceramic exhausts, Weber carb, electronic ignition, and as much chrome as I could find. A bigger engine is being planned, but not a priority just yet.
I also had a rear engine cage constructed, and if you live around here, you`ll understand why. |
|
|
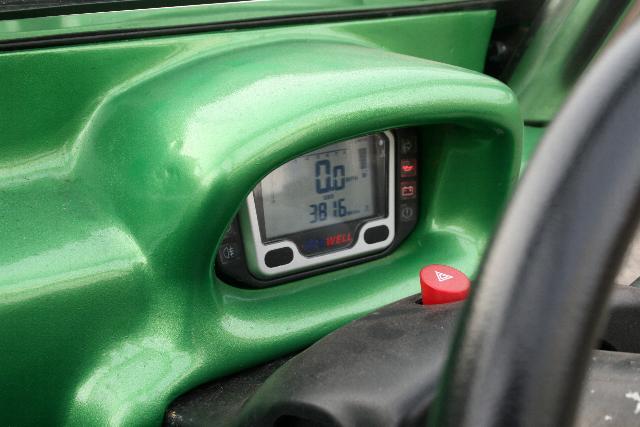
Acewell
I reconstructed a new dash board out of fibreglass, and fitted a state of the art electronic instrument cluster from Acewell
|
New Shoes
I managed to locate a set of genuine Wolfrace Slot Mag wheels, and I think you will agree that they really suit the car.
275/50/15 on 8x15 at the rear and
235/60/14 on 7x14 at the front. |
|
|
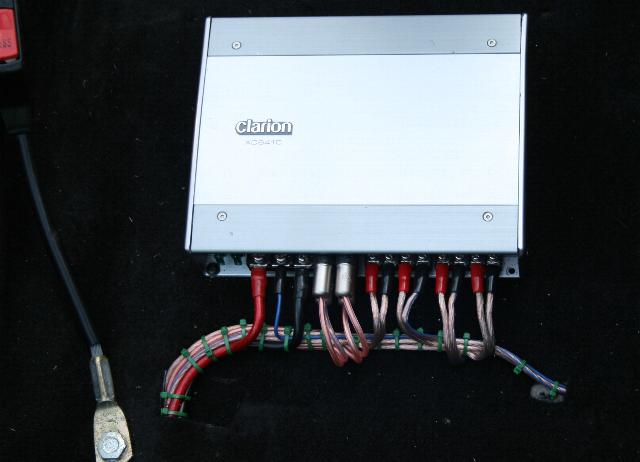
Clarion
Whilst trimming the interior, the cables were laid for the sound system, and here we can see the Clarion XC6410 Marine amplifier fitted under the seats.
We are using Marine equipment on this project, as it is highly likely that the insides of the car will get very wet with use.
|
More Stopping Power
With a new engine transplant on the cards, the brakes were beefed up by replacing the old drums to modern disc brakes |

|
|
New Engine
The original 1300 engine that was in there, whilst perfectly adequate, did not really give me the wow factor and grunt that I was after.
So I upgraded to a 1970cc engine that shares its pedigree with the Porsche 914. The power to weight ratio gives some of the boy racers a real run for their money!!
|
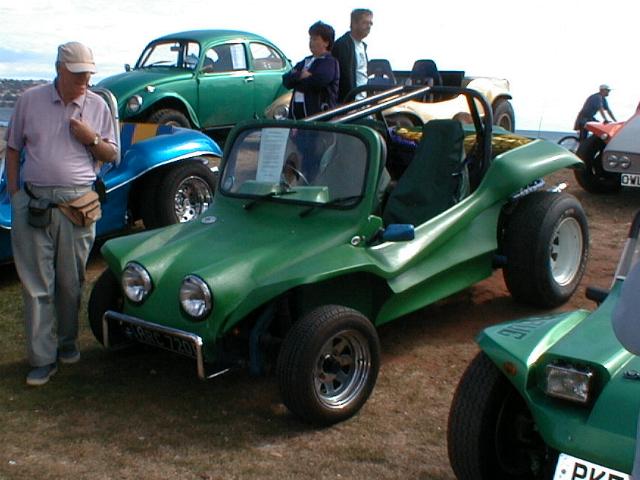
Sincere Thanks to the following :
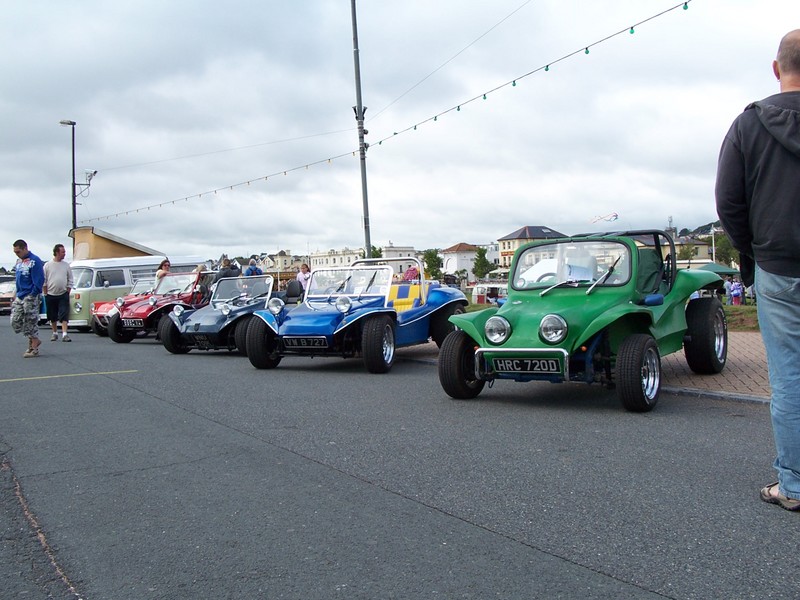
Dubs at the Beach 2007 - Paignton Seafront, Devon
Dubs at the Beach 2008
Paignton Seafront, Devon
|
|
|
Dubs at the Beach 2009
Paignton Seafront, Devon
|
Dubs at the Beach 2010
Paignton Seafront, Devon
|
|
Vintage Car Vehicle Club - 31st May 2010
Collaton St Mary, Devon
|
Vintage Car Vehicle Club
20th June 2010
Woodlands Leisure Park
Devon
|
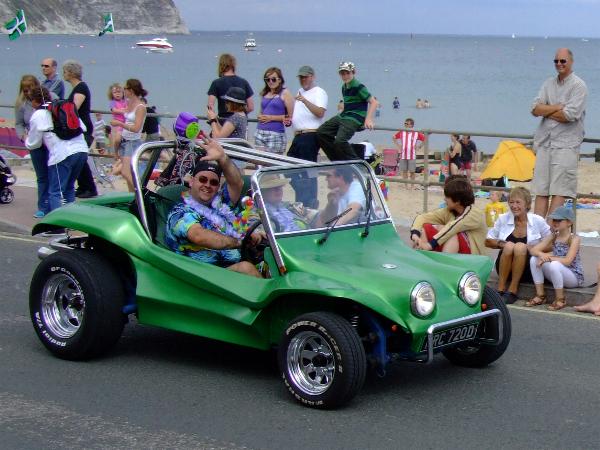
Swanage Carnival
July 2010
Swanage, Dorset
|
|
|
Classics on the Green
June 2011
The Den, Teignmouth
Devon
|
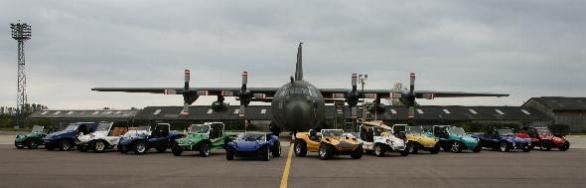
JADTEU Open Day - September 3rd 2011
RAF Brize Norton
Paignton Regatta Photo Shoot - June 2014
Paignton Beach, Devon

|
Paignton Carnival
June 2014
Paignton, Devon
Awarded 2nd Prize
In Class
|
International
Buggy Weekend
May 2015
Dilsen-Stokkem, Belgium
|

|

|
Dutch Windmills
May 2015
Kinderdijk,
The Netherlands
|
`s-Gravenzande
May 2015
Hook of Holland
|

|
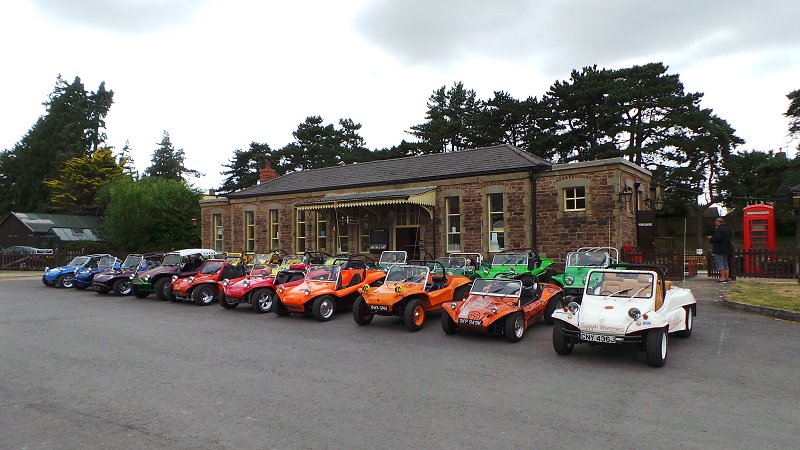
N.E.W.S. 2015
Winchcombe Station, Gloucestershire
|